Why Motorized Projection Screens Develop Waves
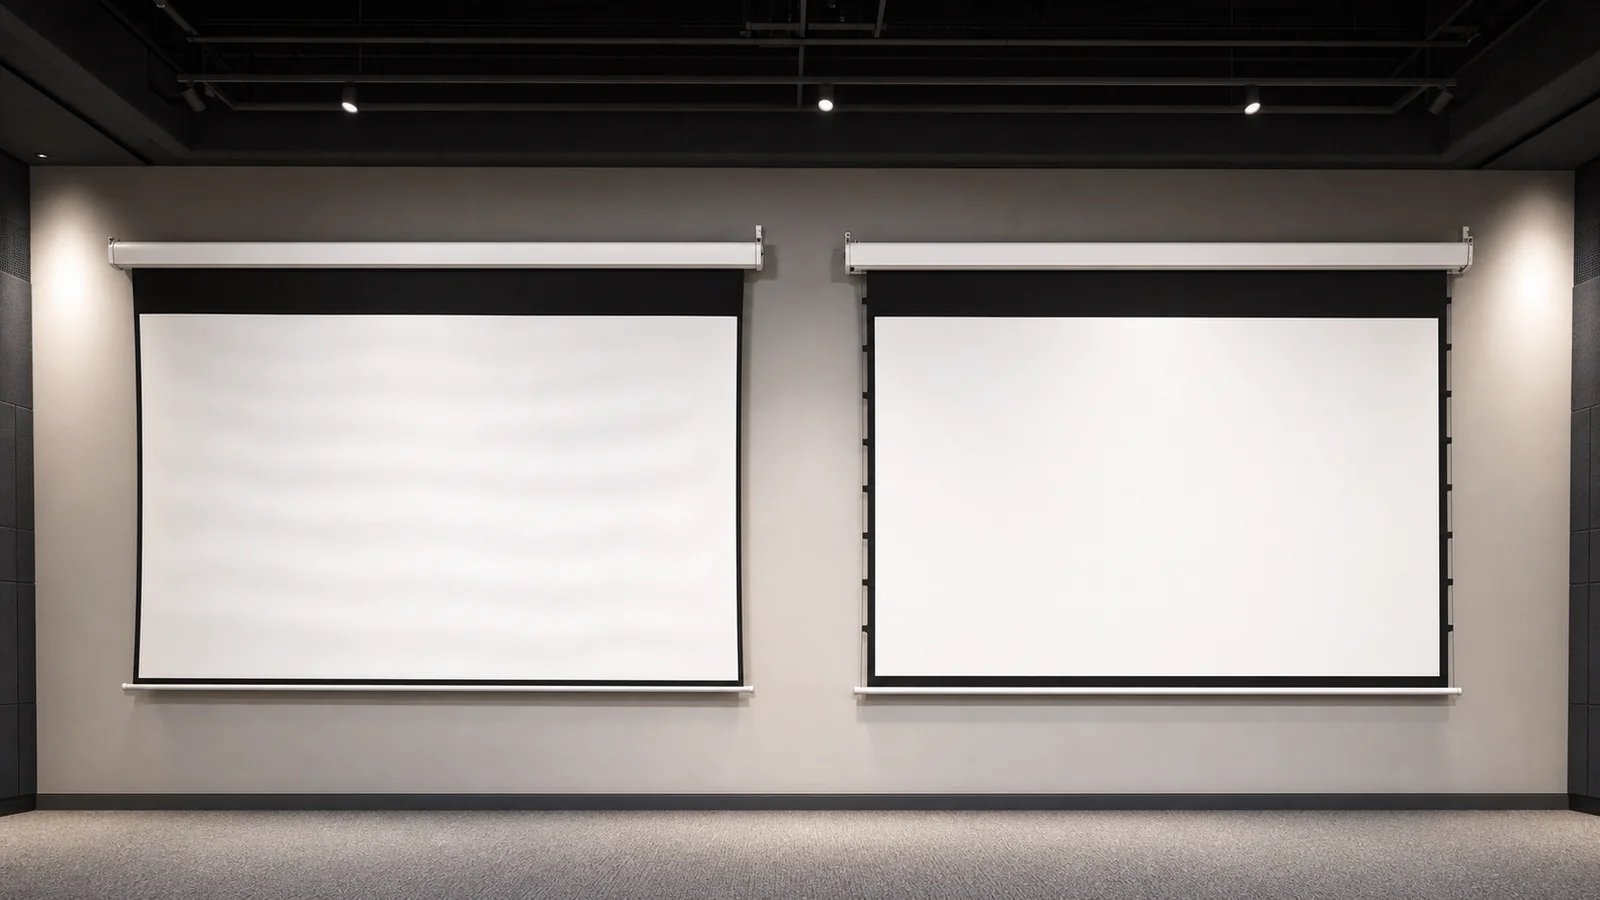
Waves on a motorized projection screen can come from the flexible material, storage on the roller, uneven mounting, roller or bottom-bar alignment, temperature, airflow, tension imbalance or damage. Some minor edge curl is a material behavior; sudden diagonal wrinkles, uneven travel or a tilted bottom bar may indicate an installation or mechanical problem.
A tab-tension system adds controlled side tension to improve planarity, but it is not a universal cure. The screen material, size, housing alignment, tension setup and projector geometry must work together.
In This Guide
First Identify the Surface Pattern
| Visible pattern | Possible direction to investigate | First safe check |
|---|---|---|
| Symmetrical edge curl | Stored material and edge behavior | Allow full deployment in stable room conditions |
| Horizontal bands | Roller storage, material memory or uneven rolling | Observe whether bands change after deployment time |
| Diagonal wrinkle | Housing level, roller tracking or uneven side force | Check bottom-bar and housing level |
| One side lower | Mounting, roller or limit/alignment issue | Stop use if travel is visibly uneven |
| Local dent or crease | Handling, impact or trapped object | Inspect without pressing or heating the surface |
| Surface moving during use | HVAC airflow or open doors | Test with direct airflow reduced |
| Image distortion mainly with UST | Surface geometry and steep light angle | Test a grid and inspect screen planarity |
Do not disassemble the housing, pull the material or change motor limits unless the product instructions authorize the work.
Why Retractable Screens Behave Differently From Fixed Frames
A fixed-frame screen is tensioned continuously around its perimeter. A retractable screen must roll into a housing, so the material needs enough flexibility for repeated storage and deployment.
Standard motorized screens usually rely on:
- the roller tube;
- gravity;
- material weight;
- the bottom bar;
- correct mounting and alignment.
This structure is convenient and economical, but it does not apply the same four-sided force as a fixed frame. Larger surfaces, flexible materials and demanding projector geometry can make small variations easier to see.
Eight Common Causes of Waves or Curl
1. Material Memory From Rolling
The surface remains stored around a roller between uses. Flexible materials can retain some curvature, especially near the edges or after long storage. The visible effect may change after the screen has been fully deployed in a stable room for a period.
Do not use a heat gun, iron, adhesive or added weight unless the manufacturer provides a specific procedure. Improvised heat or force can permanently damage coatings and seams.
2. Temperature and Humidity Changes
Materials, coatings, seams and housings respond differently to environmental changes. Rapid temperature changes, direct sun, damp storage or strong air-conditioning can affect surface behavior.
Keep the product within the supplier’s recommended storage and operating conditions. Allow a product moved from a cold or hot environment to stabilize before evaluation.
3. Housing or Roller Out of Level
A long screen installed slightly out of level can roll unevenly. A twisted housing or inconsistent mounting pressure can also affect tracking.
Check the housing and bottom bar with appropriate measuring tools. Do not judge only from the ceiling line, because decorative ceilings may not be level.
4. Uneven Bottom-Bar Alignment
The bottom bar provides weight and helps the screen hang vertically. Impact, obstruction or mechanical misalignment can produce a tilted bar or uneven surface force.
If one side travels differently, stop repeated operation and ask a qualified installer or supplier to inspect it.
5. Obstruction During Deployment
Furniture, cables, wall fixtures or packaging material can contact the screen as it moves. Even a brief obstruction can alter rolling or create a crease.
Keep the full deployment path clear and do not touch the viewing surface while it is moving.
6. Direct Airflow
HVAC outlets, fans, doors and open windows can move a large lightweight surface. This may look like a flatness problem even when the screen hangs correctly at rest.
Test the screen with direct airflow reduced. Coordinate diffuser locations during room design.
7. Material and Size Selection
Not every surface is suitable for every retractable structure or width. Thickness, backing, stretch behavior, seams and edge treatment affect rolling and planarity.
Use the current MGF screen materials catalog to review material options. Confirm the exact screen model, material name or code and screen size with MGF before selection; a similar material name does not establish compatibility with a particular retractable structure.
8. Tension or Installation Setup
On a tab-tensioned screen, side force that is too loose, too strong or uneven may not produce the intended result. The tension system, bottom bar and roller need to be balanced.
Adjustment methods vary by product. Follow the current manual or request service guidance rather than turning adjustment points at random.
How Tab Tension Helps
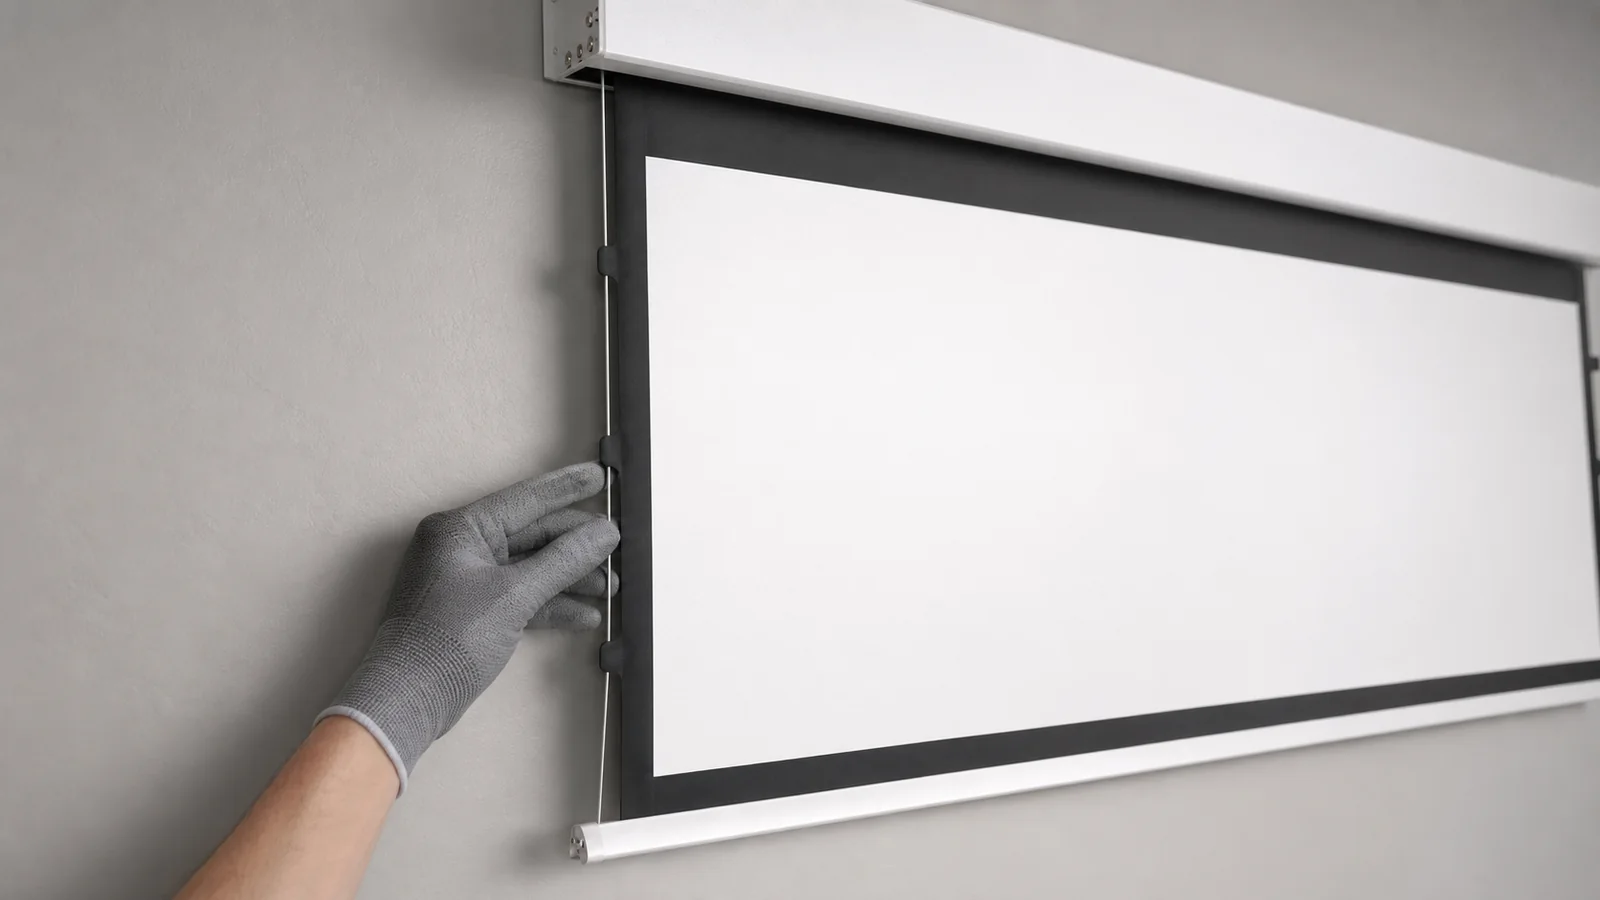
A tab-tensioned screen uses cords or cables along the sides of the viewing surface. Tabs connect the material edge to the tension line, distributing controlled lateral force while the weighted bottom bar provides vertical force.
This can help:
- reduce visible edge curl;
- improve surface planarity;
- support flexible materials that need perimeter control;
- provide a better starting surface for detailed images;
- make a retractable format more suitable for premium AV rooms.
MGF’s tab-tension projection screen range includes recessed, aluminum-casing and other tensioned directions. For concealed projects, review the in-ceiling tab-tension electric screen.
What Tab Tension Cannot Fix
Tab tension cannot compensate for every problem. It will not automatically solve:
- a twisted or incorrectly mounted housing;
- a damaged roller or bottom bar;
- a permanent crease or puncture;
- an incompatible material;
- incorrect projector alignment;
- excessive airflow;
- installation outside the product’s intended conditions;
- a tension system adjusted incorrectly.
It also does not make a retractable screen identical to a fixed-frame surface under every condition.
How This Guide Differs From the Tab-Tension Comparison
This page is for wave diagnosis, safe troubleshooting and service evidence. For the structural, cost and application comparison between tab-tensioned and non-tensioned screens, use the Tab-Tensioned vs Non-Tensioned guide rather than repeating that selection discussion here.
Diagnostic Decision Tree
Use the pattern to choose the next safe action. This is a screening path, not permission to adjust a motor or tension system without the exact product instructions.
| Observed pattern | Safe first action | Pass / Fail decision | Next step |
|---|---|---|---|
| Symmetrical edge curl | If operation is safe, deploy according to the exact model manual and observe for the specified or supplier-agreed period in stable room conditions with direct airflow reduced. Record the observation time and conditions. | Pass screening if the curl reduces and is not objectionable from the agreed viewing distance; Fail if it remains persistent or worsens. | Record photos and conditions; request service if persistent. |
| Single-side drop | Stop repeated operation. Check housing and bottom-bar level without opening the product. | Fail if one side tracks differently, the bottom bar is visibly tilted or the screen contacts a guide. | Keep the screen out of service until a qualified installer or supplier reviews it. |
| Diagonal wrinkle | Stop repeated cycles and inspect housing, roller path and bottom-bar alignment from the outside. | Fail if the diagonal pattern remains after the agreed settling period or changes with travel. | Send level measurements, static photos and any existing operating video. If travel is abnormal or unsafe, do not run the screen to record a video; do not adjust one side at random. |
| UST grid distortion | Project a fine grid and verify the screen plane, projector geometry and approved material. | Fail if geometry distortion remains after projector alignment and the screen is fully settled. | Request a screen/material/projector compatibility review. |
| Permanent local crease | Stop operation and do not press, heat, iron or add weight to the surface. | Fail if a local crease remains visible after stable deployment and is present in repeat photos. | Move directly to a supplier service or replacement-surface assessment. |
Quantified Wave and Flatness Check
There is no universal wave tolerance for every material, size or projector. Use the exact manual, approved sample or written project tolerance as the controlling standard; record measurements rather than describing a surface only as “flat.”
| Check | Test condition | Pass / Fail standard | Record and action |
|---|---|---|---|
| Settling period | If operation is safe, deploy according to the exact model manual in stable conditions and use its specified observation period. If none is specified, agree the observation period with the supplier before assessment. | Pass only when the agreed observation period is complete and the pattern is stable. | Record start/end time, room temperature, humidity and airflow. |
| Edge curl | Inspect from the agreed viewing distance using the approved image or grid. | Pass when edge behavior is not objectionable at the agreed audience position and does not affect image geometry; no generic “normal curl” claim overrides the project acceptance record. | Photograph left, centre and right; escalate persistent or increasing curl. |
| Level and tilt | Measure housing and fully deployed bottom bar left-to-right in millimetres over the available span. | Pass only against the exact drawing/manual tolerance or a written project tolerance; if none exists, do not declare a technical pass. | Record the measured mm, tool and measurement points; stop if one side drops or contacts. |
| Tracking and noise | Review any existing operating video first. Do not run a screen with abnormal or unsafe travel for this check. Any permitted operating check must follow the exact model manual, with the path clear and the outside alignment check complete. | Pass when travel is even with no scraping, rubbing, impact, binding or abnormal vibration. | Use existing video where available; stop immediately if abnormal travel or noise occurs. Send static photos and a fault description instead of repeating operation for a recording. |
| UST geometry | Use a fine grid with the approved projector, lens/throw and image mode. | Pass when the visible image remains geometrically acceptable after screen settling and projector alignment; surface distortion is not solved with excessive keystone. | Record projector model, throw, grid photo and measured image offset. |
| Permanent damage | Repeat the same photo from the same angle after stable deployment. | Fail when a local crease, puncture, seam defect or impact mark remains clearly traceable. | Request replacement or warranty review; do not attempt heat or force. |
When to Request Replacement or Service
| Condition | Stop using? | Service direction |
|---|---|---|
| Temporary symmetrical curl that reduces during the model-specified or supplier-agreed observation period | Not necessarily, if travel is even and no contact occurs | Document it and monitor under the same conditions. |
| Single-side drop, tilted bottom bar, contact or uneven tracking | Yes | Request installer/supplier inspection before further cycles. |
| Persistent diagonal wrinkle after correct installation review | Yes if travel is affected; otherwise hold for review | Request housing/roller/alignment and tension-system diagnosis. |
| Permanent local crease, puncture, seam damage or collision mark | Yes | Request replacement-surface or complete-unit assessment with order evidence. |
| UST grid distortion after projector and screen-plane checks | Not automatically, unless travel is unsafe | Request material/projector compatibility review before replacement. |
Safe Troubleshooting Sequence
- Check for reported or visible abnormal travel, noise, contact or a one-sided drop before operating. If any is present, keep the screen out of operation and request installer or supplier review; do not run it just to film the fault.
- Record the product model, size, material and installation date.
- Take static photos of the complete screen, housing, bottom bar and wave pattern without moving the screen solely for documentation.
- Check accessible housing and bottom-bar alignment from the outside without opening or adjusting the product.
- Only if operation is safe, follow the exact model manual to deploy with the path clear. Stop immediately if abnormal travel, noise or contact occurs.
- Check whether direct airflow is moving the surface and record the room conditions.
- Observe the pattern for the model-specified or supplier-agreed period and record the start and end times.
- If the screen can remain safely deployed, project a grid to document image distortion.
- Include any existing operating video. For abnormal or unsafe travel, provide static photos and a fault description instead of another operating cycle.
- Send the evidence to the installer or supplier before attempting adjustment.
Information to Send the Supplier
Provide:
- product code and order reference;
- size and aspect ratio;
- material name;
- installation method;
- date the issue appeared;
- room temperature and recent environmental changes;
- photos from front, side and close range;
- any existing operating video; if travel is abnormal or unsafe, static photos and a fault description instead of a new operating cycle;
- housing and bottom-bar level checks;
- projector type, especially for short- or ultra-short-throw;
- any impact, obstruction or previous adjustment.
This helps separate material behavior from mounting, tracking, tension or damage.
Common Troubleshooting Mistakes
- Pulling the bottom bar to “stretch” the screen;
- attaching extra weights;
- heating or ironing the surface;
- cleaning with unknown solvents;
- changing motor limits repeatedly;
- adjusting only one tension side without instructions;
- operating through an obstruction;
- diagnosing UST image distortion without checking the screen plane;
- calling every visible variation a manufacturing defect before checking installation.
FAQ
Do all motorized screens develop waves?
Retractable surfaces can show some material behavior, but the severity varies by material, size, structure, installation and environment. Sudden or uneven changes should be documented and inspected.
Will leaving the screen down remove wrinkles?
Some temporary rolling patterns may change after deployment in stable conditions, but permanent creases, mechanical misalignment or incorrect tension require a different response. Follow supplier guidance.
Is a tab-tensioned screen completely flat?
Tab tension improves planarity by adding controlled side force, but actual results still depend on material, size, installation and adjustment. Avoid absolute flatness guarantees without an agreed specification and inspection method.
Is tab tension necessary for a meeting room?
Not always. A standard motorized screen may be sufficient for general presentations. Tab tension is more relevant when image detail, material type, premium finish or demanding projector geometry raises the flatness requirement. For a new installation, review the conference-room screen planning page and provide the room layout, projector type and intended presentation use.
Why does UST projection make waves more visible?
UST light reaches the screen at a steep angle. Small surface deviations can redirect that light and make geometry or brightness variations more noticeable.
Request a Screen-Flatness Review
For an existing screen fault: Send MGF the screen model, size, material name or code, order reference, installation photos, projector type and room conditions. Include any existing operating video. If travel is abnormal or unsafe, stop operation and send static photos and a fault description; do not run the screen solely to record a video.
For a new project or bulk order: Include the required image size, quantity, installation method, projector model or type, ambient light, delivery destination and agreed flatness or acceptance requirements. Review the tab-tensioned vs non-tensioned screen comparison to discuss the appropriate structure with MGF.
Contact MGF Screens for a motorized or tab-tension screen recommendation.