Square Housing vs Aluminum Casing Motorized Screens
---
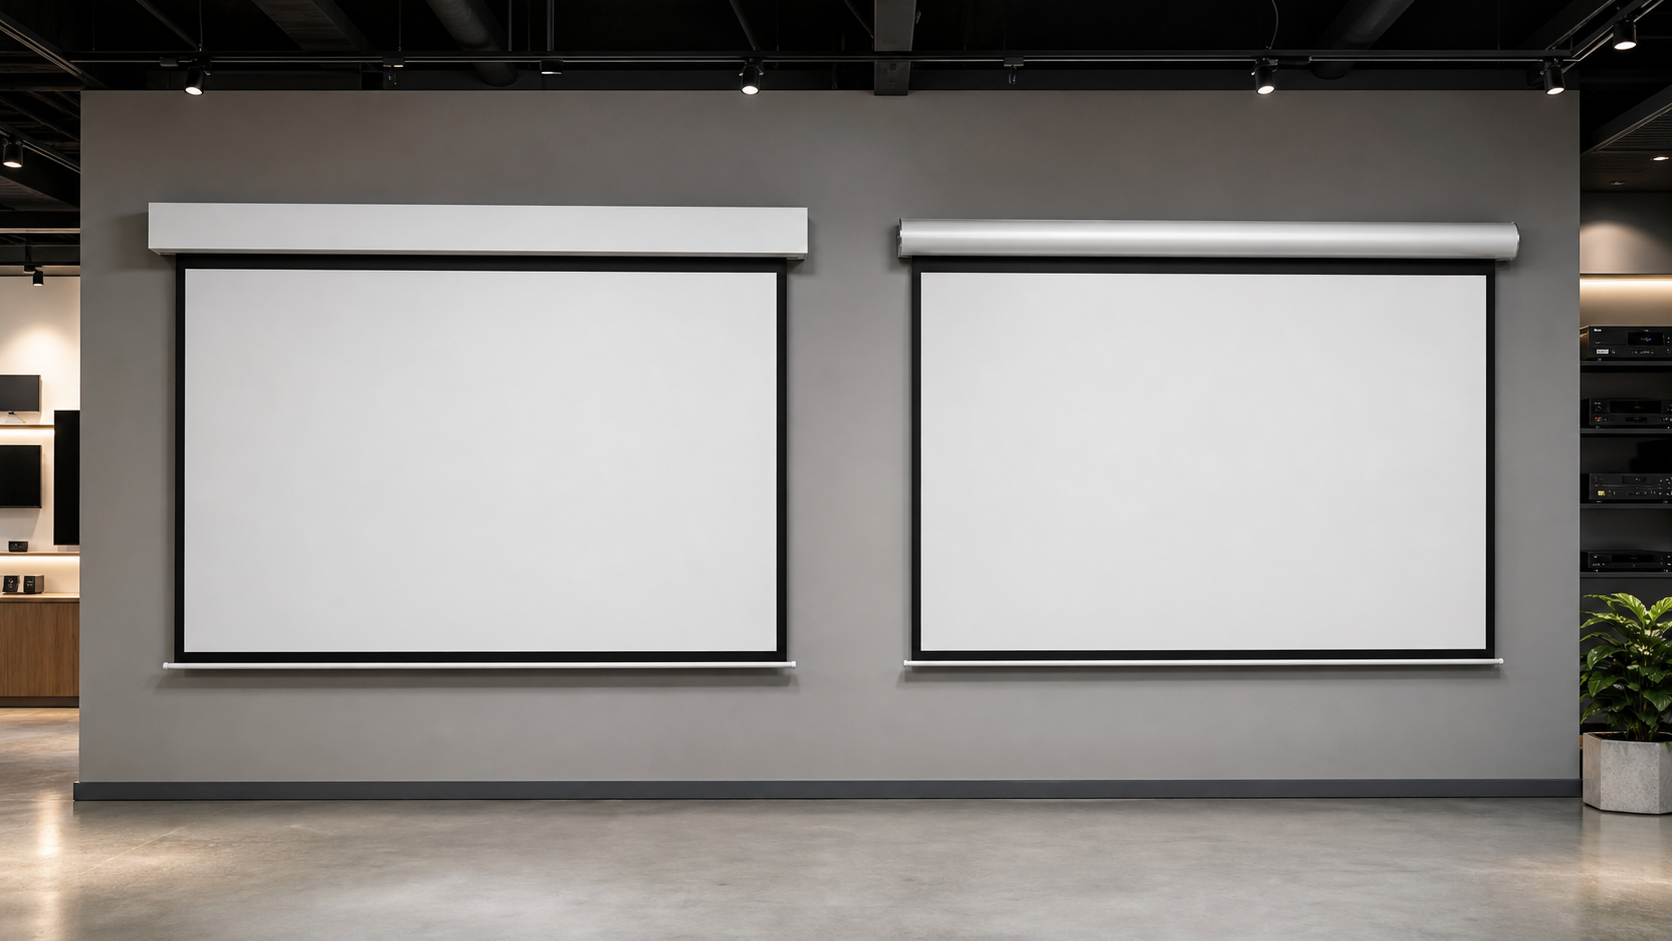
Choosing between a square housing and an aluminum casing motorized screen is an installation and project-specification decision, not simply an appearance choice. The housing profile affects how the screen sits on the wall or ceiling, how the brackets are coordinated, how the cable route is hidden and how service access is maintained.
The screen surface, projector geometry and room conditions still control the image. Use this guide to compare the structure before requesting a model drawing.
In This Guide
Quick Answer
Choose a housing direction from four questions:
- Is the casing visible or concealed?
- How much mounting and service space is available?
- Does the project need a particular visual profile or finish?
- Which exact product family supports the required image size, material and control?
If a project has no special casing constraint, begin with the electric projection screen range and narrow the choice using image size, mounting method and material.
Who This Guide Is For
This guide is for AV integrators, distributors, contractors and project buyers who need a documented selection and project-planning path for this topic before requesting a quotation.
What a Square Housing May Offer
A square or rectangular housing can present a clear geometric line above the image. It may coordinate with architectural details, ceiling edges or a wall-mounted AV package. Its external shape can also make it easier for a project team to read the installation envelope on an elevation drawing.
The exact benefit depends on the current model. Confirm the outer dimensions, bracket locations, cable entry, image drop and clearance rather than assuming that every square casing shares the same construction.
What an Aluminum Casing May Offer
An aluminum casing can be considered when the project wants a defined metal enclosure and a clean finish. Aluminum is a material description, not a guarantee of a particular size, weight or performance. The final product still depends on the roller, motor, fabric, bottom bar and mounting system.
For a compact casing direction, compare the 80mm aluminum housing guide and request the model drawing. For a round profile, see the 95mm round housing guide.
Comparison Table
| Decision point | Square housing | Aluminum casing / profile | Confirmation required |
|---|---|---|---|
| Visual language | Geometric and architectural | Defined metal enclosure | Finish and visible casing detail |
| Mounting | Wall or ceiling, model dependent | Wall or ceiling, model dependent | Bracket and fixing drawing |
| Image quality | Not determined by shape | Not determined by shape | Material, geometry and flatness |
| Service access | Depends on access panel and position | Depends on access panel and position | Motor and control service route |
| Material choice | Model dependent | Model dependent | Current material compatibility |
| Concealed installation | Only with documented design | Only with documented design | Rough-in, closure and access |
Match the Housing to the Room
For a conference room, the selection usually needs to balance a clean wall, repeatable operation, clear sightlines and simple control. For a classroom, consider the screen height, student viewing positions and daily operation through the Education Classroom application page.
For a commercial display environment, a visible casing may be part of the equipment language, but the project still needs service access and a documented control path. For a dedicated home theater, compare a fixed frame before selecting a retractable enclosure.
Appearance, Service and Replacement
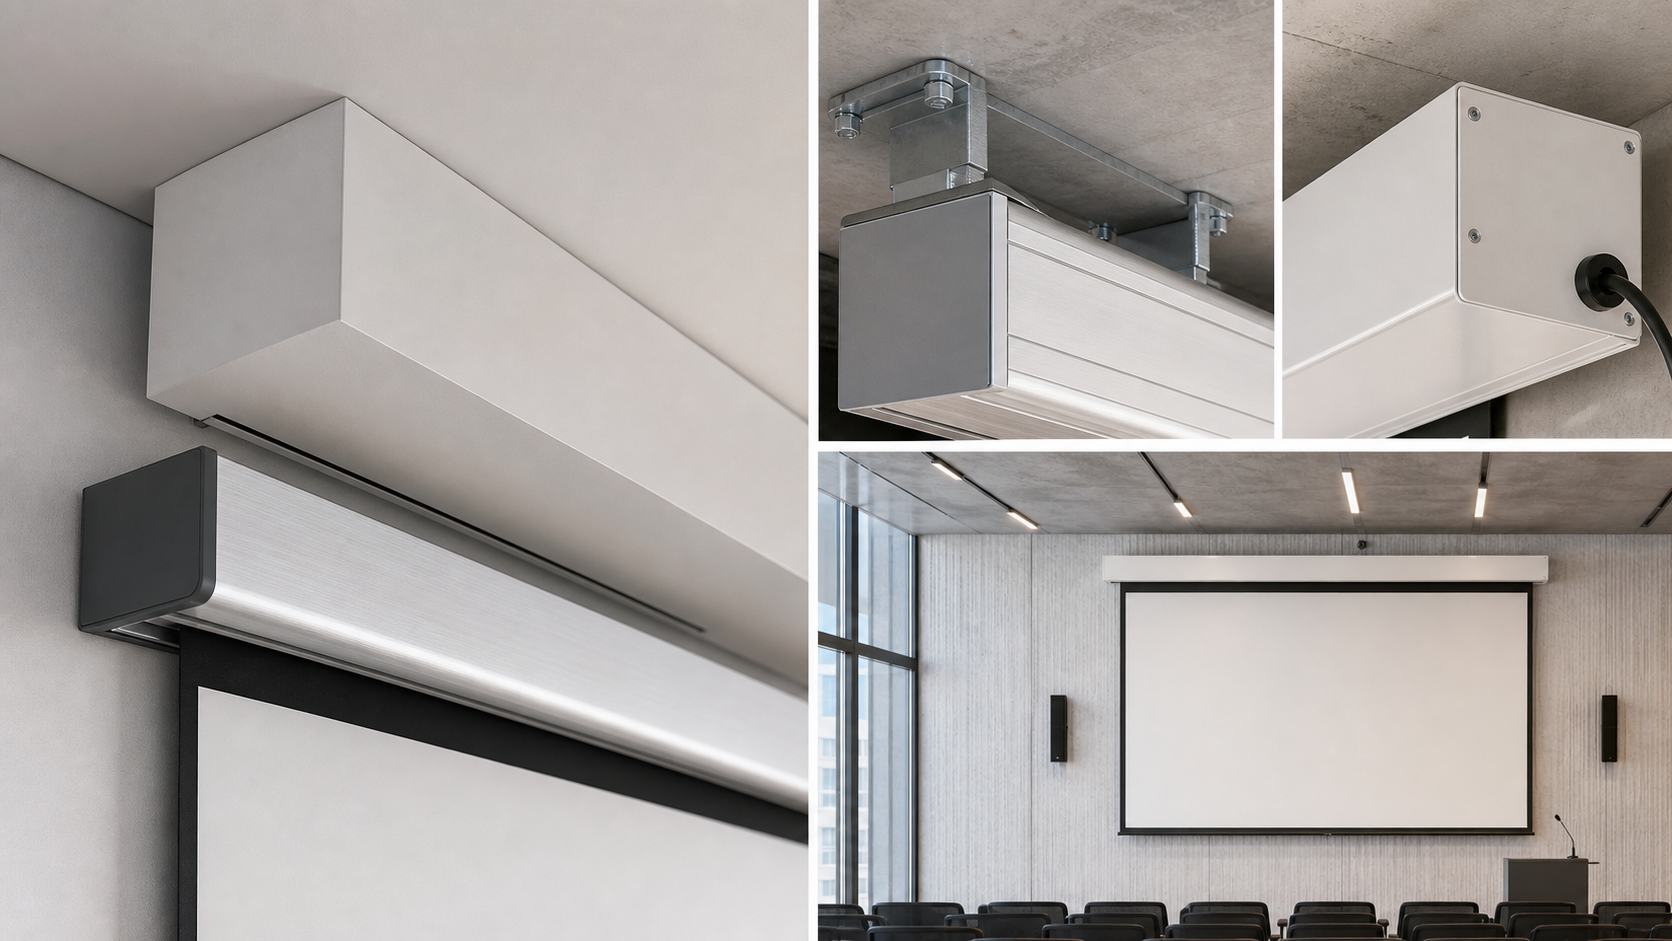
The enclosure is part of the room’s finished elevation, so request a sample or finish reference when color, gloss or visible seams matter. A product photograph may hide the bracket, cable entry or end-cap detail that becomes visible after installation. Record the approved finish and orientation on the drawing.
Service planning is equally important. Identify how the motor, controller, roller and fabric can be inspected without removing unrelated ceiling or wall finishes. For replacement projects, record the existing housing width, image size, drop, material and control method. A visually similar enclosure may still require different brackets or wiring.
Approval Workflow for a Housing Comparison
Use a simple approval sequence: confirm the image size, compare the two housing drawings, review the material sample, mark the room elevation, confirm control and access, then approve the packing and identification method. Keep one approved model name and revision for procurement, installation and handover.
Do Not Choose the Housing Before the Surface
A casing comparison should be made after the image and material requirements are understood. Matte white, grey, ALR, UST/CLR and acoustic transparent surfaces can behave differently under the same projector and room light. Use the Screen Materials Hub and the ALR versus matte white guide to frame the sample discussion.
If the projector is short-throw or ultra-short-throw, confirm the material and installation angle for the exact product. If speakers sit behind the image, evaluate an acoustic transparent surface as a combined image and audio decision.
Installation and Procurement Checklist
Before approval, document:
- visible image width, height and aspect ratio;
- overall casing dimensions and finish;
- black border and drop requirements;
- projector position and lens geometry;
- room application and ambient light;
- power and control method;
- wall or ceiling fixing structure;
- access for motor, controller and fabric service;
- packing, delivery and site access constraints.
When the project requires drawings or version control, use the Factory & Production page as a trust link and request the current technical package. Send the final requirement through Contact MGF Screens.
MGF Product Direction
MGF can compare suitable product directions once the project brief confirms visible image size, aspect ratio, projector geometry, material direction, mounting condition, control requirements, quantity and destination market. The final quotation should identify the exact model, compatible material, drawing and approval information rather than treating a generic guide as a product specification.
Project / OEM Checklist
- visible image width, height and aspect ratio;
- projector model, lens position and image geometry;
- room or venue use, seating and ambient-light condition;
- proposed material, structure, mounting and service access;
- power, control and installation responsibility where relevant;
- required quantity, destination market, drawing revision and approval owner.
Continue Your Project Planning
- Screen Selection Guides
- Electric Projection Screens
- Fixed Frame Projection Screens
- Conference Room Applications
- Factory & Production
- Projection Screen Size and Aspect Ratio Guide
- Contact MGF Screens
FAQ
Is an aluminum casing stronger than a square housing?
The terms describe different construction or profile attributes and cannot be ranked without the exact model, material and fixing method.
Does a square housing provide a flatter image?
No. Image flatness depends on screen type, fabric, tension system, installation level and operating conditions.
Can either housing be used for an in-ceiling installation?
Only if the exact product is designed for it. Confirm rough-in, closure and service access with the model drawing.
Which housing is better for OEM projects?
The better option is the one that matches the approved drawing, repeatable specifications, packaging and service process. Appearance alone is not enough.
Request a Side-by-Side Product Review
Send the target image size, room, projector, mounting method, visible casing preference and control requirement to MGF Screens. Ask for comparable drawings and samples before selecting the final enclosure.